In all thy ways acknowledge him, and he shall direct thy paths. ~ Proverbs 3:6
Showing posts with label house. Show all posts

Friday, April 19, 2013

$2 Chalkboard Sign - Home Sweet Home


A few weeks ago, I decided to decorate the second story shelf in my entry, and this sign ened up being part of my decor.


I found the frame at Goodwill for $1.99.  Since I purchased it on the first Saturday of the month, I only paid $1 for it.  I didn’t have a purpose for it at the time of purchase, but I loved the color and knew I could do something creative with it.


While thinking about things to put on my shelf in the entry, I remembered I had the frame and decided to make a chalk board sign out of it.  I wanted the sign to be light-weight, so I completed this project using a piece of foam board from the Dollar Tree and supplies that I already had in my craft drawer.


First, I cut the board to fit the frame.


Then, using chalk board paint a foam roller.....


......I painted the board.  


Once the paint had dried, I lined the board up with the frame to make sure it fit perfectly….


….and then I hot glued the board to the back of the frame.


Lastly, I took a piece of chalk and wrote “Home Sweet Home” on the board…..
…before enlisting my husband to climb on a ladder and arrange a few things for me.

Not too bad for a $2 project if you ask me:)


Tuesday, October 2, 2012

A Red Front Door....


          Now that October is here, I plan on getting my porch all decked out for the fall season this week.  Before I do that, I wanted to take a few pictures of a few recent updates we did to the exterior of our home.  This past summer, we updated the exterior light fixtures and hardware, had our shutters painted black and my favorite thing….had our front door painted red.  I love a red front door!  A friend of mine gave me the color (red rose bouquet) that she used on her front door ( you can find her blog here.)  While the painters only used Sherwin Williams paints, they did agree to match the color up for me, and I think that it turned out great!  Along with painting the door, we replaced the builder-grade brass fixtures and hardware to make the exterior look even better!  And of course we painted over the green shutters with black, which made a world of difference in my opinion.  To give the door a little more character, I bought number decals for the door from an Etsy shop.  I have to say that the decals did not go on like a normal decal.  They went on like stickers and made it rather difficult to get it to look straight and perfect on the door. While the price was good, I don’t know that I would buy that kind again.

            Most home projects we do ourselves, but once in awhile we hire someone to do the job for us.  Painting the shutters and door was one of those times.  We found a local company who gave us a really good deal.  In the end, I was pleased with the results, but I will say that the process was rather frustrating and took a total of three weeks to get finished.  It was really a miscommunication with the company.  If you live in the Indy area and would like their contact info, message me and I can get it to you. 
      
          In the future, we would like to paint the exterior siding and put a fence up.  Both of those are expensive, so I'm not sure when in the future we will get that done.  And of course we have some minor landscaping to do.   I am happy to say that we are getting a start on that this week.  The giant bushes are getting ripped out, and a new bed is getting cut out for spring.  I'm really excited to work on my green thumb skills this next year.  In the mean time, I'm just happy that we conquered the door, the shutters and light fixtures:)


BEFORE AND AFTER PICS......
 

BEFORE

AFTER
BEFORE
 
AFTER
 
BEFORE
AFTER


A FEW MORE PICS......


Tuesday, May 29, 2012

A Sneak Peek......


       The other day, I shared with you that we have been working on our floors this past month. It has been a huge undertaking as we are ripping out all of our carpet and replacing it with laminate.  We have 3,000 square feet of flooring to put down, and we’re only halfway done.  I say "we"  like I’ve been the one laying the floors, but it’s really been my husband and his brother doing most of the work….lol.  Progress is scheduled to resume the second weekend in June.  That’s the next weekend that Matt’s brother has a weekend off of work and is available to come help us.  We really couldn’t take on this project without him, and I am very thankful for his help.  I will share with you why we chose laminate over hardwood in a future post, but today I just wanted to give you a sneak peek of the progress that we’ve made.  I’ve been told this project will be completed in about a month and I can’t wait!  Until then, here are few pics of the progress we’ve made so far.....


P.S.   All of these pictures were taken with my camera phone. They're not the best pictures, but it gives you an idea of how things have been comin' along at our house this past month;)

Sunday, May 27, 2012

May Flowers.....


The other day, I told you that we’ve been planting flowers for the wonderful summer season.  Today, I'm sharing a few pics of our outdoor living spaces all decked out for the warmer months:)


Tuesday, April 24, 2012

I Heart My New Wall Decal....


I feel the need to apologize for the pictures in this post.  I’m certainly not a professional photographer…..far from it actually, but I do try to post decent pictures on my blog.  It must have been the lighting or something, because all of these pictures look dark and unfocussed to me.  Perhaps it's time to invest in a new camera.  Anyway, this is the best I could do with these pictures today, so here we go........  


I have several vinyl wall decals throughout my home.  I love them all, but my new monogram wall decal that I purchased for our bedroom might just be my favorite!


I knew I wanted a large monogram decal to go above these bedroom windows, because I wanted to draw the eyes up to the vaulted ceiling.

As I was shopping around, I found the perfect decal on Etsy.  You can find it here.


Considering the large size of this decal, the price wasn’t bad at all.  I think it was worth every penny and accents the style of our bedroom perfectly. The product is exactly what I expected, and it was easy to work with when applying it to the wall.  In my opion, it was $26 well spent:) 


I was not compensated or given any gifts for my opinion of this product.  All opinions of this product are my own.


Thursday, March 22, 2012

DIY Beaded Lamp Shades


I’ve mentioned in previous blog posts that we’ve been working on getting our guestroom set up.  Today, I want to share about the pair of lamps I found for the room.

 I found these lamps at Goodwill before Christmas and purchased them with the guestroom in mind.  Both lamps were priced at $15 a piece, which is kind of high for Goodwill.  Since I bought them on the first Saturday of the month, I only paid $15 for both of them. 

That’s still probably more than I would have liked to pay. These are really nice lamps though, and I was just kind of drawn to them.

Knowing that I still needed lamp shades for my new lamps, I went to my craft closet and pulled out two shades that I got during last year’s garage sale season.  I paid a quarter a piece for them and thought that I could get a little creative with them. 


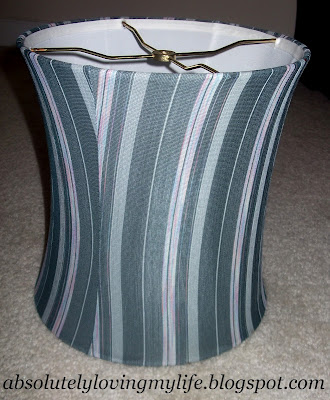
To start this project, I first had to tear off the ugly fabric.


Second, I cleaned the glue from the fabric off the frame and spray painted it with this metallic spray paint.


Once the frame was prepped, I started the beading process. I already had beading thread, but I needed to buy some beads, so I kept my eye on the Hobby Lobby weekly ads. I waited for the week that beads were half off, and then I bought eight bags of these beads (110 beads per pack/sized 12 mm).

FYI: After I bought my beads, I found some here on Amazon for a similar price to the sale price at Hobby Lobby, but the Amazon size is smaller than mine (1,000 beads per pack/sized 6mm).   I also found these beads (480 beads per pack/8mm) here on Amazon .  If you really don't want to spend hours stringing beads, and you aren't opposed to spending a little more money, go here to find 30 feet of linked beads for $20.

Once I had my supplies, I was ready for the beading process to begin.   To do this, I first had to knot a piece of beading thread to the top of the lamp frame.

Once the knot was secure, I beaded the thread, like I would a necklace, the length of the frame.

Then, I knotted the end of the thread to the bottom of the lamp frame.


I repeated until I had beaded enough strands for the frame….

 I screwed the lamp shade onto the base of the lamp…..

…..turned it on, and watched it glimmer:)

In the end, each lamp shade cost about $5 a piece, and I really like the way they look in the guest room.