In all thy ways acknowledge him, and he shall direct thy paths. ~ Proverbs 3:6
Showing posts with label crafts. Show all posts

Thursday, March 29, 2012

Red Button Art - Family Sign


I've seen a lot of "button" art floating around on blogs and Pinterest lately. Most of what I've seen has used buttons to created monogrammed framed art. I really like the look and texture of the buttons, so I created my own art by using buttons on this family sign.


First, I went to Goodwill and spent $3 on a frame to repurpose for this project.


Then, I trimmed two pieces of scrapbook paper that I already had to fit inside the frame.


Next, I went to JoAnn's and got a variety of red buttons for about $5 total.


Then, I went home and using a large font, I printed the word "Family" on my computer.  Once the word was glued to the scrapbook paper, I hot glued a variety of red buttons to the letter "F".


Lastly, using acrylic craft paint, I quickly painted the wood frame black.


After the paint had dried over night, I hung my new piece of art on the family room wall. And as most of my projects do, this piece of art cost me less than $10:)

Thursday, March 22, 2012

DIY Beaded Lamp Shades


I’ve mentioned in previous blog posts that we’ve been working on getting our guestroom set up.  Today, I want to share about the pair of lamps I found for the room.

 I found these lamps at Goodwill before Christmas and purchased them with the guestroom in mind.  Both lamps were priced at $15 a piece, which is kind of high for Goodwill.  Since I bought them on the first Saturday of the month, I only paid $15 for both of them. 

That’s still probably more than I would have liked to pay. These are really nice lamps though, and I was just kind of drawn to them.

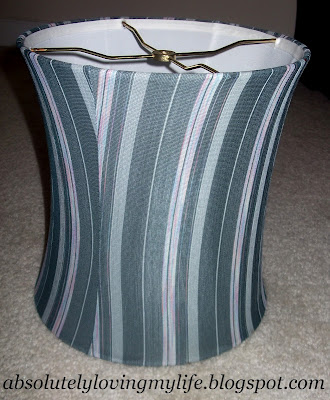
Knowing that I still needed lamp shades for my new lamps, I went to my craft closet and pulled out two shades that I got during last year’s garage sale season.  I paid a quarter a piece for them and thought that I could get a little creative with them. 


To start this project, I first had to tear off the ugly fabric.


Second, I cleaned the glue from the fabric off the frame and spray painted it with this metallic spray paint.


Once the frame was prepped, I started the beading process. I already had beading thread, but I needed to buy some beads, so I kept my eye on the Hobby Lobby weekly ads. I waited for the week that beads were half off, and then I bought eight bags of these beads (110 beads per pack/sized 12 mm).

FYI: After I bought my beads, I found some here on Amazon for a similar price to the sale price at Hobby Lobby, but the Amazon size is smaller than mine (1,000 beads per pack/sized 6mm).   I also found these beads (480 beads per pack/8mm) here on Amazon .  If you really don't want to spend hours stringing beads, and you aren't opposed to spending a little more money, go here to find 30 feet of linked beads for $20.

Once I had my supplies, I was ready for the beading process to begin.   To do this, I first had to knot a piece of beading thread to the top of the lamp frame.

Once the knot was secure, I beaded the thread, like I would a necklace, the length of the frame.

Then, I knotted the end of the thread to the bottom of the lamp frame.


I repeated until I had beaded enough strands for the frame….

 I screwed the lamp shade onto the base of the lamp…..

…..turned it on, and watched it glimmer:)

In the end, each lamp shade cost about $5 a piece, and I really like the way they look in the guest room.

Friday, March 16, 2012

DIY Flower Wreath ~ Made From Book Pages


I’m sure you’ve seen faux curled wood wreaths in many of the stores lately.  I was inspired by one I saw at Target for $40.  I loved the look of the wreath and after examining it, I though to myself, “I could make this”.  After searching the internet and seeing other people make similar looking wreaths, I was certain I could make one.  Although my inspiration was faux curled wood, I decided to use the pages of a book to give me a similar look to the Target wreath, while still giving my wreath my own personal style.
   While this project cost less than $10, it did take me A LOT of time.  And by that, I mean SEVERAL hours.  I didn’t even finish it all in one night.  I took an hour here and an hour there to finish it.  After about a week of working on it, it was finally finsihed.  This project sort of reminded me of the tediousness of making my CoffeeFilter Lamp Shade.  Just like that lamp shade, the finished product was well worth it.

First, I bought a Styrofoam wreath from my local craft store.  They are usually priced around $5, but always check the weekly ads for coupons and sales.

Next, I bought a book for $1 at my local Goodwill store.  I then cut spirals out of the pages of the book.  I cut several pages at once to make this step go by faster.  Dollar stores, thrift stores and garages sales are great places to buy an inexpensive book for this particular project. 

Once I had my pages cut, I took each individual spiral and rolled it into a flower…..

…..until it looked like this, and then I used hot glue to hold it together.   I also made a few flowers out of cream cardstock and mixed them in with the book pages to add interest to the piece.

Then I began hot gluing the flowers to the wreath……

….until it looked like this. 

The wreath adds a little bit of interest to the table in the entry…..

….and as most of my projects do, this entire project cost less than ten bucks. J

Thursday, January 26, 2012

DIY Canisters from Recycled Holiday Tins


I mentioned in my last post (Labeling Glass Canisters) that I had a DIY canister project I wanted to share with you.  Well, here it is.  After several years of using small, glass Ikea canisters for my baking needs, I've moved on to these large, repurposed canisters….and it only cost me $10 to do it:)

I was inspired by these canisters that I saw at Hobby Lobby.  In need of the large canisters, I priced them only to discover they were $15 a piece.  I needed eight canisters for the following items: flour, sugar, brown sugar, powdered sugar, stevia, tea, coffee and hot chocolate.  I really didn't want to spend one hundred-plus dollars on canisters, so I decided that I was just gonna have to get creative.


Here's what my canisters  looked like before their makeover.  I recently found these holiday tins at Hobby Lobby, and the best part is that they were clearanced at 90% off.  While these tins met my storage needs, the festive decorations on them....well, not so much.  To fix that little problem,  I got my craft on and spruced them up a bit.

These are the way my canisters turned out after they received their makeover.   Obviously my version of these canisters is not dishwasher safe.  Since they are only holding flour and sugar, a quick wipe down of the inside of the canisters is sufficient when they need to be cleaned.  Supplies needed for this project are as follows: recycled tins, paper, Mod Podge, letters, and spray paint.  Here's how I gave eight holiday tins a practical makeover.

First, I took off all of the lids off and painted the tops of them only.  I did not paint the bottom of the lids for obvious reasons.

While the lids were drying, I began to transform the outside of the tins with paper and Mod Podge.  I measured my paper to fit each container.  It took two pieces of scrapbook paper to fit around one container.

Once the paper was ready to be assembled, I brushed a layer of Mod Podge onto one half of the container.

Then, I placed one of my pieces of paper onto the glued surface.  Once the first piece was secure, I Mod Podged the other side and applied the second piece of paper.

Here's a helpful tip when working with Mod Podge.  To avoid those pesky bumps, air bubbles and wrinkles that tend to form as the Mod Podge dries, use some sort of flat tool to even them out before they dry.  I use my pizza scraper, and it does wonders.  And since the pizza scraper is  only being used on the paper, not the glue, there isn't any crafting damage done to my kitchen tool.  Multi-purpose, now that's what I'm talkin' about;)

Once the paper has been applied around the perimeter of the container, a second layer of Mod Podge needs to be applied to the paper to give  a sealed, finished look to the containers.

After my containers were dry, I decided that I wanted to make labels for each container.  To do this, I simply used Word.  I printed out my labels and cut out each individual letter for the canisters.  I then applied the letters to the paper using the same Mod Podge technique that I used to apply the paper to the canisters.  Stickers would have saved me a lot of time, but it would have also cost me more money.  My money was worth more than my time, so I chose the tedious way of making labels for this project;) The font that I used was Cooper Black.  I used 120 font size for the larger containers and 100 font size for the smaller ones. 

After I made the five large canisters, I made these three smaller ones for coffee, hot chocolate and tea.  I used the same Mod Podge  methods to make these as I did the other five.   If Mod Podge isn't your thing, recycled tins can receive a simple makeover with a coat of paint and some stickers for labels.   If you can find a pattern that suites your taste, contact paper could even be an alternative for this project. 
 
So that's it!  Recycled and repurposed, these newly revamped canisters represent my style in a practical and inexpensive way.  Does it really get better than that:)

Friday, December 23, 2011

Handmade Personalized Lockets


           Do you ever have a hard time trying to think of a thoughtful Christmas gift for the special gals in your life?  I know that I struggle with that from time to time.  As most of you know, I am a nanny for a family with two girls.   Finding the right gift for the girls and the parents can be challenging for me whenever gift giving time comes around.  The girls have a ton of toys, so I try to avoid the toy stores when I'm contemplating what gifts to get them.   For Christmas, I always try to give the girls something small that incorporates the true meaning of Christmas, Christ birth, and then I usually get them something that we can do together like craft kits or games.  Sometimes I’ll even make them something sentimental.
            Recently I made jewelry and posted about it here.  Both Mom and Daughters really liked the jewelry that I made, so I decided to personalize a few pieces for them and add it to their Christmas gifts this year. For the mom, I made a necklace with a locket of the girl’s pictures and an appropriate quote inside.  For the girls I made necklaces with lockets as well, but I tried to incorporate a small piece of my faith inside their locket.  On the inside of their locket I glued a mustard seed, and then I made a tiny scroll with the verse Matthew written on it and put it inside the locket. When the necklaces were finished I put them in festive sachets that I had leftover from previous gift giving ideas, and attached them to the top of their wrapped presents. 
            Since I already had most of the jewelry making supplies, this was a relatively inexpensive gift idea.  While inexpensive, the fact that it was handmade makes it thoughtful and specific to the person’s taste.  And by adding a locket, I was able to take it step further and personalize the gifts.  So next time you’re trying to think of a thoughtful gift for the special ladies of your life, try being creative with jewelry making;)


Thursday, December 8, 2011

DIY Decoupaged Porcelain Ornament for Less Than $1


These ornaments could be adjusted for your specific needs and could be personalized with fun sayings or individual names.  For less $1, they make really great, inexpensive, personalized, quick and easy, homemade giftsJ

            For those of you who don’t know, I have a large family.  I have seven siblings, and most of them have families of their own.  In fact, my parents have seventeen grandchildren.   One of the things my mom gives the grandchildren every Christmas is an ornament.  This year she wanted to give ornaments that specifically said, “You’re My Favorite” to each grandchild, because thy all seem to think that they are Grandma’s favorite, even though Grandma is constantly reminding them that they are all her favorite.  It has kind of become a joke between all them, so my mom asked me to make the ornaments.  She instructed me to make them on a tight budget, since she needed me to make seventeen of them.  Oh, and I shoud also mention that I needed to make all of them before Thanksgiving, because my family gets together to celebrate Christmas the day after Thanksgiving.  I was able to make all of the ornaments for about $13.  That’s less than $1 for each ornament.  Not too bad, if I day say so myself;)


SUPPLIES :

Porcelain Ornament – $1 at Hobby Lobby, but I wait for them to go half off.  I was able to get all 17 ornaments for $.50 each

Scrapbook Paper – .$.59 per sheet at most craft stores, but I always wait for them to go on sale for 5 for $1.  I used 4 pieces of Christmas scrapbook paper for this project.  Christmas wrapping paper would also work for this project.

Mod Podge – Usually about $6 for a standard bottle, but most stores have coupons for one item in their weekly ads.  I always have this on hand, so I didn’t need to buy any for this project. 
Small Foam Paint Brush - $.44 at most stores.  I like using these for small decoupage projects, because they are inexpensive and they cover well.

Paint – I used spray paint, only because I had plenty of silver on hand and wanted an even coverage.  C raft paint would also work


Computer – I used the computer to print my phrase, because I had so many ornaments to make.  Stickers would work too, but it could get costly if you have multiple ornaments to make.

Ribbon - $1.99 at most craft stores.  I got mine half off for $1.

DIRECTIONS:

Trace ornament over the back side of paper twice (two circles per ornament).  Cut out all circles.  Lay all ornaments flat on an area prepped for paint.  Paint one side and let dry.  Once dry, paint the other side and let dry.   Decoupage circle to one side and let dry.  Once dry, decoupage other circle to the other side and let dry.  Print out words, cut using a cutting board and decoupage to front side ornament.  Once ornament is completely dry, put the ribbon on the ornament and hang on tree or wrap as a gift. J